 Save
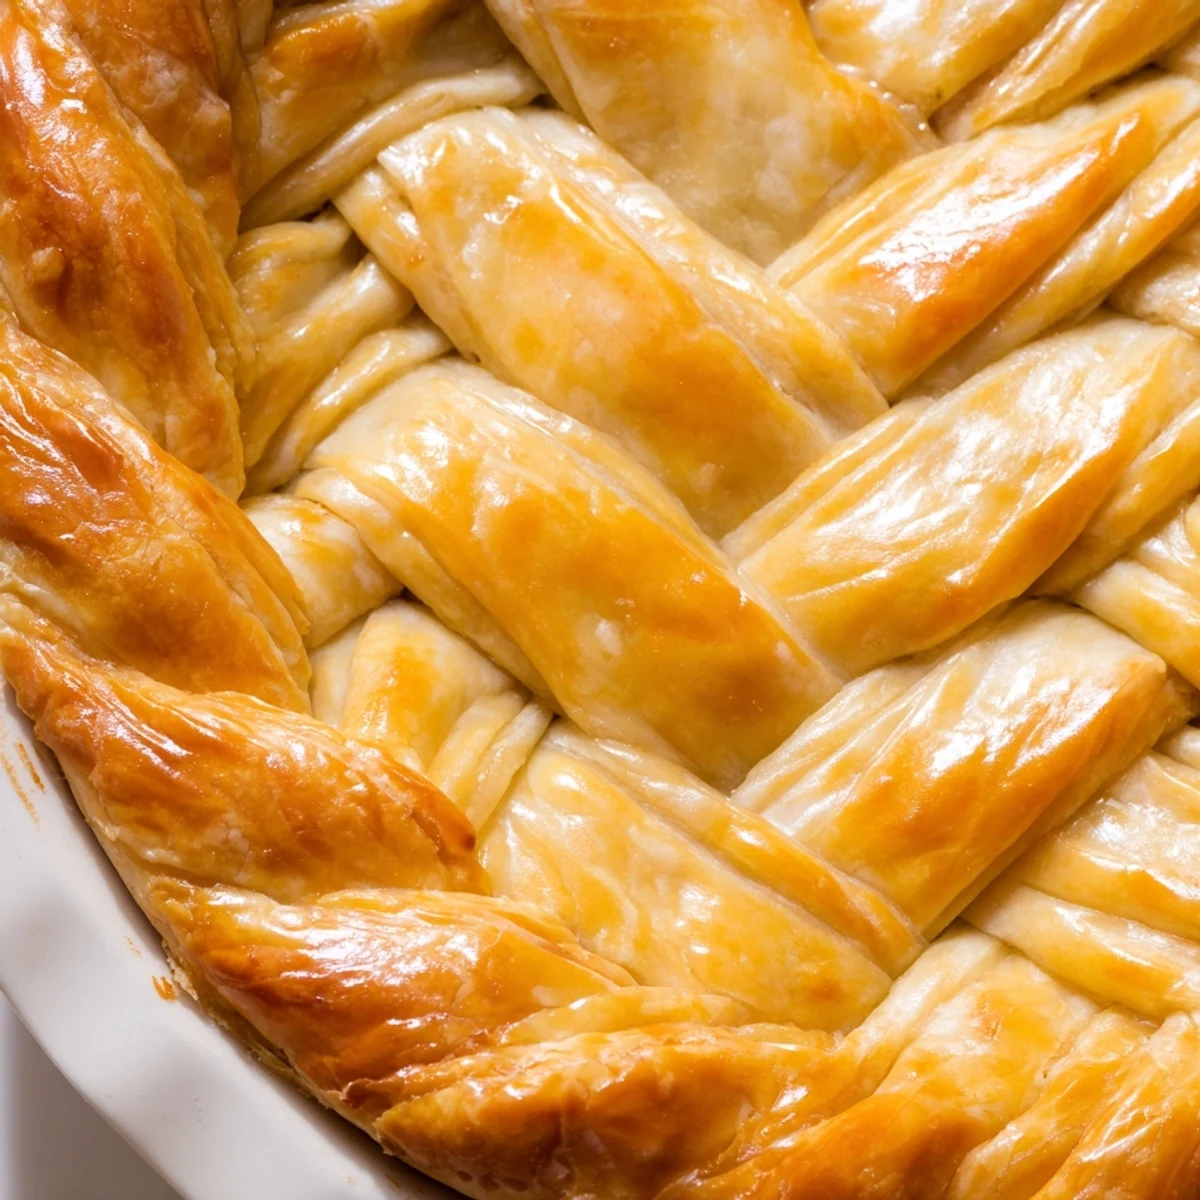
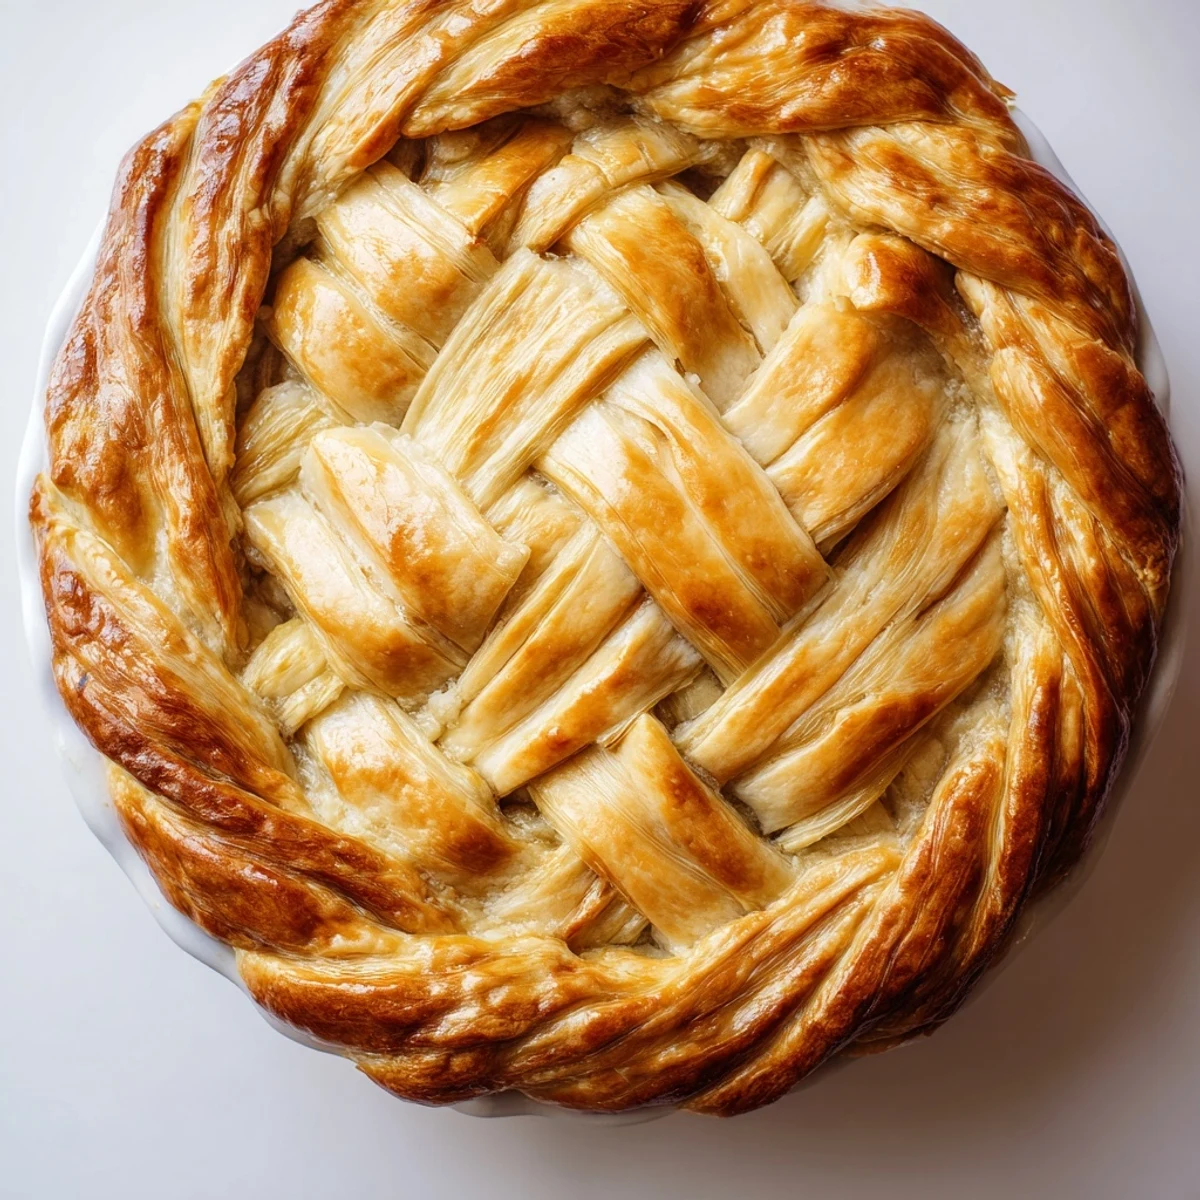
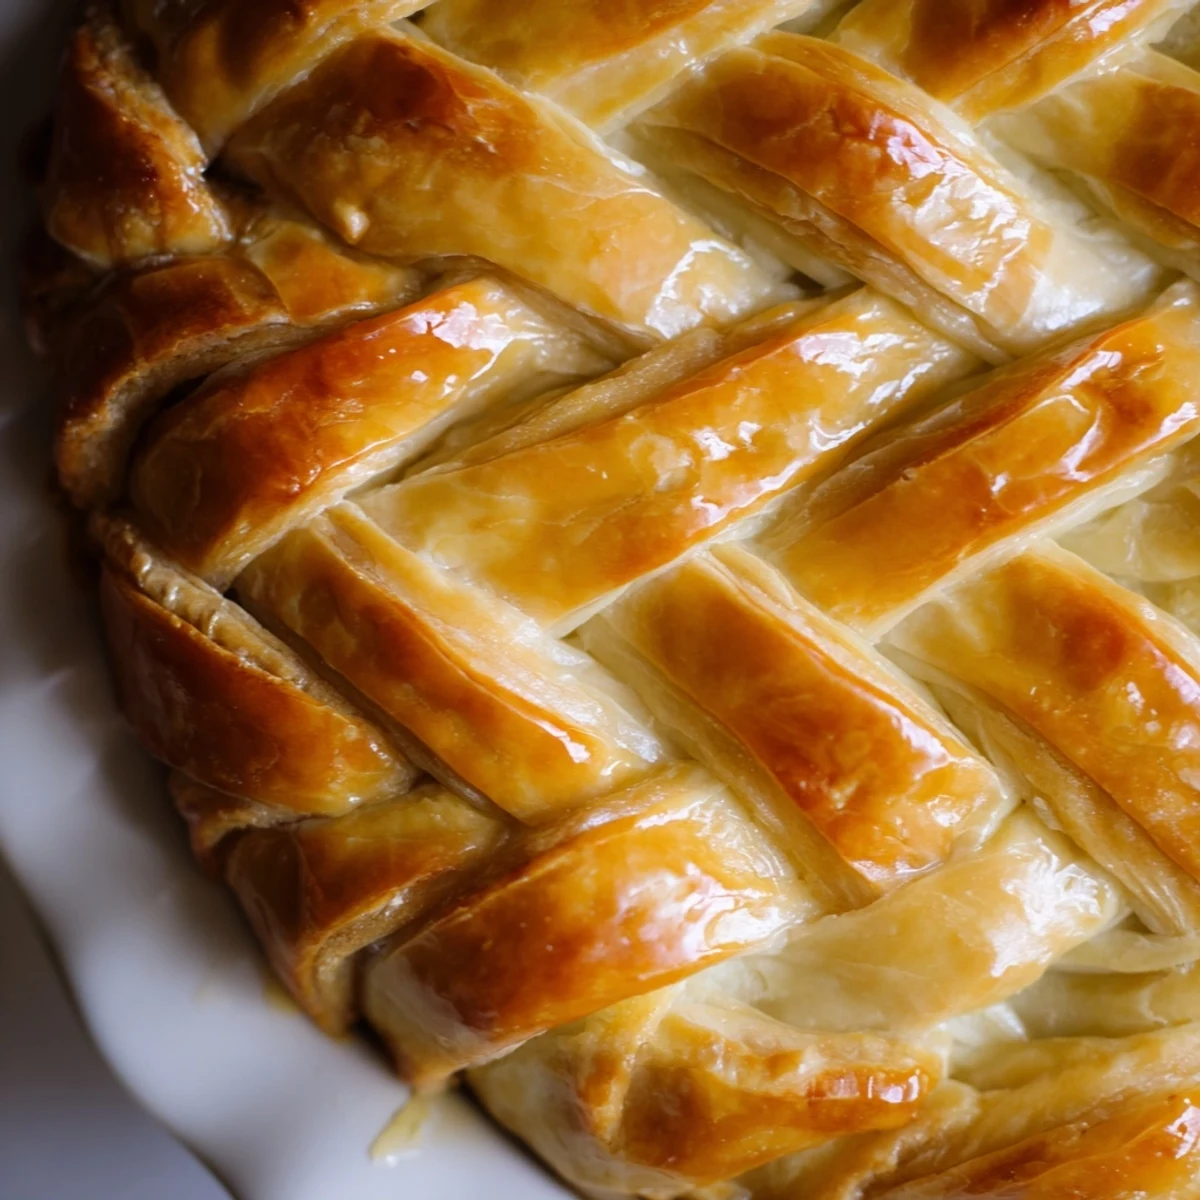
Save Elevate your homemade pies with a professional-looking fishtail braid crust. This decorative technique transforms ordinary pastry into a stunning centerpiece perfect for holidays, dinner parties, or special occasions. The method involves weaving four strips of dough in an overlapping pattern that creates a beautiful braided effect around the pie edge.
The process starts with a classic butter-based dough that chills thoroughly for easy handling. After preparing your bottom crust, you'll cut strips from the second disc and learn the simple weaving pattern: cross the left strip over, then under, alternating across all four strands. The result is an intricate bakery-style finish that looks impressive but requires only basic technique.
This versatile decoration works equally well with fruit pies, custard fillings, or savory pot pies. The braided edge adds structural support while creating a golden, flaky frame that bakes evenly. Total hands-on time is about 30 minutes, plus chilling time, making it achievable for home bakers of intermediate skill level.
The first time I attempted a braided crust, my kitchen looked like a flour bomb had gone off. I'd watched too many baking videos and assumed muscle memory would kick in, but instead I ended up with tangled strips and melting butter. Three attempts later, something clicked about keeping everything ice-cold and working quickly. Now this fishtail technique is my go-to when I want a pie that stops people mid-conversation at potlucks.
My sister's wedding pie was the moment this crust became my signature. I'd practiced for weeks, cutting strips at midnight after work until my fingers knew the rhythm. When the catering staff asked where I'd ordered it, I knew all those flour-covered evenings were worth every mess.
Ingredients
- All-purpose flour: The foundation of any great pie crust, providing structure and that tender flake we all chase
- Cold unsalted butter: Keep it straight from the fridge because cold butter creates the pockets that make pastry magical
- Salt and sugar: Just enough to enhance flavor without making this a sweet dough
- Ice water: The colder the better, and add it gradually rather than all at once
- Egg and milk: For that gorgeous golden finish that makes people ask for seconds
Instructions
- Mix the dry ingredients:
- Whisk flour, salt, and sugar in a large bowl until thoroughly combined
- Cut in the butter:
- Work quickly with a pastry cutter or your fingertips until the mixture looks like coarse crumbs with some pea-sized butter pieces remaining
- Bring the dough together:
- Add ice water one tablespoon at a time, mixing gently until the dough just holds together when pressed
- Chill the dough:
- Divide into two discs, wrap tightly, and refrigerate for at least one hour or until firm
- Prepare the base:
- Roll one disc to fit your pie plate, press gently into place, trim the edges, and return to the fridge
- Cut your strips:
- Roll the second disc to about 1/4 inch thickness and cut twelve even strips, approximately 1/2 inch wide
- Create the braid sets:
- Group strips into sets of four and pinch the tops together to secure them
- Master the fishtail:
- Number your strips from left to right as 1 through 4, then cross strip 1 over 2, under 3, and over 4, repeating with the new leftmost strip each time
- Attach the braids:
- Carefully transfer each braid to the chilled pie edge, pressing gently to seal and trimming any excess
- Chill again:
- Refrigerate the assembled pie for 15 minutes while preheating your oven to 400°F
- Add the finishing touch:
- Brush the braided edge with egg wash and blind bake until golden brown and beautifully set
 Save
Save There's something deeply satisfying about pulling a pie from the oven with that braided crown glowing golden. My neighbor actually knocked on my door the first time I baked this, following the buttery scent like a cartoon character.
Temperature Secrets
Cold ingredients are non-negotiable for flaky pastry. I even chill my flour and bowl now after one too many summer batches turned into tough, sad crusts. The moment you feel butter softening against your fingertips, take a break.
Assembly Confidence
The braiding looks intimidating until you realize it's just repeating the same motion over and over. I hum while I work now, each cross matching a beat, and somehow the rhythm helps my hands remember the pattern better than my brain ever could.
Perfecting Your Technique
Every pie baker has their own philosophy on crust thickness, edges, and decoration methods. This fishtail style is just one beautiful option in a world of creative possibilities.
- Practice the braiding motion with strips of paper first if you're nervous about wasting dough
- Keep a small bowl of ice water nearby to seal any cracks that appear while working
- The ugliest homemade pie still beats the most beautiful store-bought one every single time
 Save
Save Serve this with pride, knowing you created something that looks like it came from a bakery window. Every imperfect braid tells a story of time spent in the kitchen, and that's the most beautiful ingredient of all.
Recipe Questions & Answers
- → Can I make the dough ahead of time?
-
Absolutely. The dough discs can be wrapped tightly and refrigerated for up to 3 days or frozen for up to 3 months. Thaw frozen dough overnight in the refrigerator before rolling. The braiding step works best with thoroughly chilled dough, so preparing ahead actually improves results.
- → What if my braided strips break while weaving?
-
If a strip tears, simply overlap the ends and press them together gently. The dough is quite pliable when cold, and small imperfections won't be noticeable after baking. You can also patch any gaps with scraps of dough and smooth with damp fingertips.
- → Do I need to blind bake this crust?
-
Blind baking is recommended for custard pies or fillings with shorter baking times to ensure the bottom crust cooks completely. For fruit pies that bake 45 minutes or longer, you can fill directly. The braided edge benefits from the initial 12-15 minute blind bake to achieve golden coloring without over-browning.
- → Can I use store-bought pie dough?
-
Yes, refrigerated pie dough works well for this technique. Let it thaw according to package directions, then proceed with the braiding method. You may need to roll it slightly thinner than homemade dough to achieve even strips. The flavor and texture will still be impressive.
- → How do I prevent the braid from coming loose during baking?
-
Chilling the assembled pie for 15 minutes before baking is crucial. This firms the butter in the dough, helping the braid hold its shape. Brushing the attachment points with water or egg wash also acts as glue. If any sections lift, press them gently back into place with a fork during the first minutes of baking.
- → Can I make a continuous braid around the entire pie?
-
Creating separate braided sections and joining them at the edges is easier and yields consistent results. However, if you roll your strips long enough, you can create one continuous braid. This requires very long strips and careful handling to maintain even tension as you work around the curve.