 Save
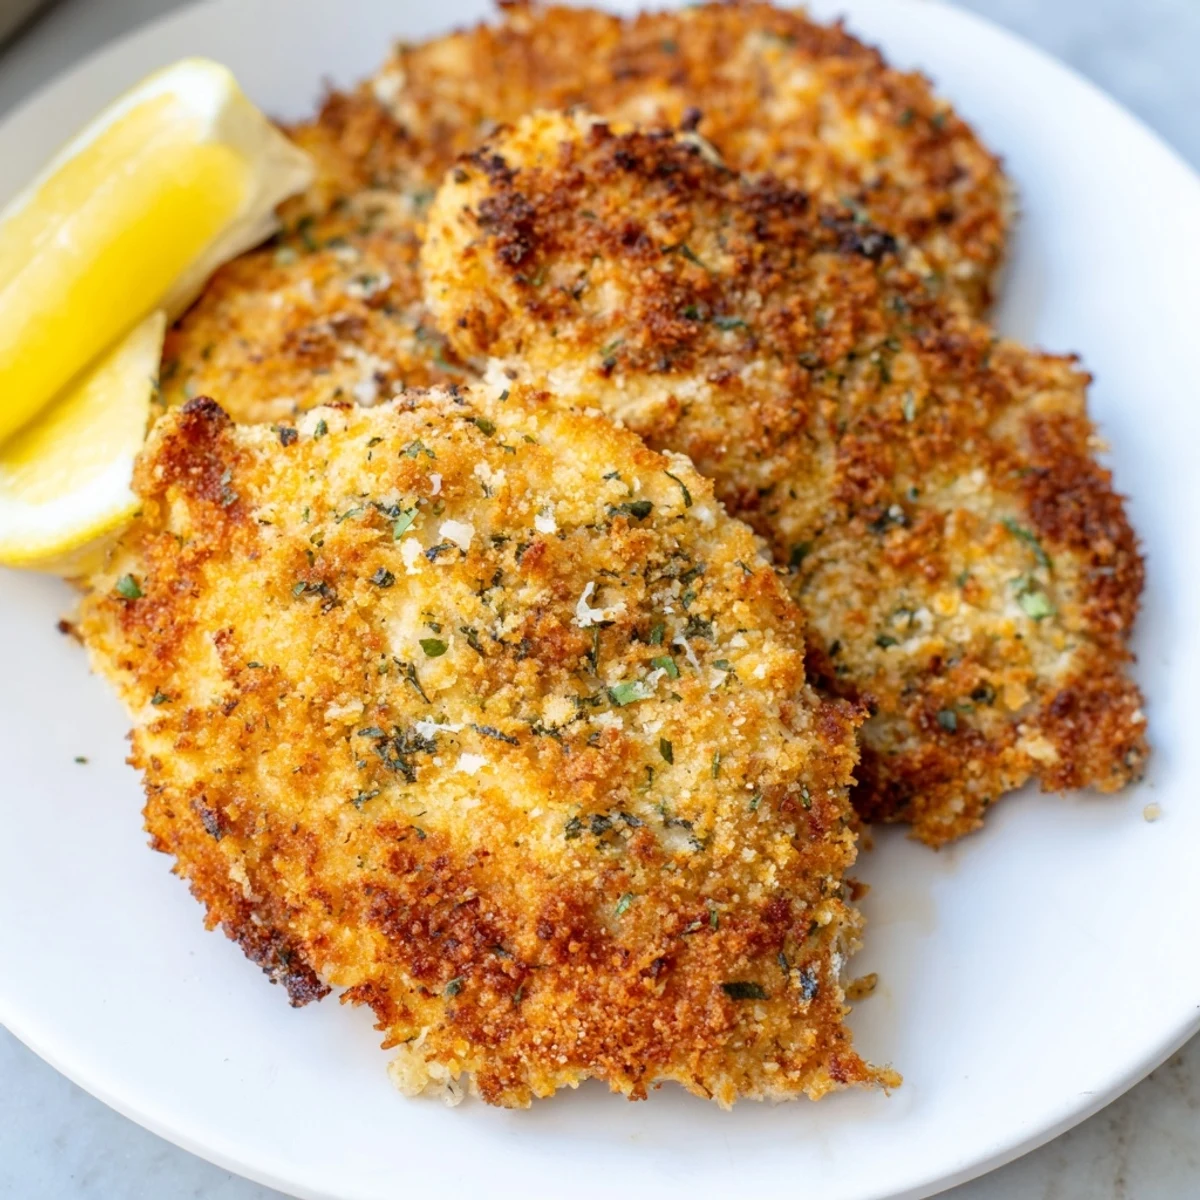
Save These classic Italian-American chicken cutlets feature tender, pounded chicken breasts coated in a savory three-step breading process. The combination of seasoned flour, egg wash, and breadcrumb-Parmesan mixture creates that signature crispy exterior that's golden and delicious.
Perfect for busy weeknights, this 30-minute meal delivers restaurant-quality results with minimal effort. Serve with lemon wedges for brightness, alongside pasta marinara or a fresh green salad. The cutlets also make exceptional sandwiches the next day.
The secret lies in pounding the chicken to even thickness for uniform cooking and pressing the breadcrumbs firmly to adhere. Frying in hot olive oil creates that irresistible crunch while keeping the meat juicy inside.
The smell of chicken cutlets frying in olive oil takes me straight back to my grandmother's cramped Brooklyn kitchen, where she'd pound chicken breasts with such determination that the whole apartment seemed to shake. I learned everything I know about achieving that perfectly golden, crunch-when-you-bite-it crust from watching her work, though it took me years to understand that the real secret wasn't some fancy technique but simply patience with the oil temperature and not crowding the pan.
Last summer, I made these for a impromptu dinner party when my cousin dropped by unexpectedly with her family. Everyone ended up standing around the stove, eating cutlets directly from the paper towel-lined plate as I finished frying them, and that messy, joyful moment of people reaching over each other for another piece became one of my favorite kitchen memories of the year.
Ingredients
- Chicken breasts: Pounding them to an even thickness is non-negotiable here, and I've found that going slightly thinner than half an inch actually helps them cook more evenly without drying out
- All-purpose flour: This first coat helps the egg wash stick better, and shaking off the excess prevents the breading from becoming too thick and doughy
- Eggs and milk: Whisking these together creates a better adhesive than eggs alone, and the milk adds just enough richness without making the coating too heavy
- Italian breadcrumbs: The herbs and seasonings already mixed in save you a step, but adding extra Parmesan deepens the savory flavor significantly
- Parmesan cheese: Freshly grated melts into the breading beautifully, though the pre-grated stuff works in a pinch if you're in a hurry
- Dried oregano and garlic powder: These two are the backbone of that classic Italian-American flavor profile that reminds everyone of their favorite red-sauce joint
- Olive oil: It splutters more than vegetable oil but the flavor payoff is worth it, and I keep a splatter screen nearby to minimize the mess
- Lemon wedges: That bright acid at the end cuts through the fried richness and somehow makes everything taste lighter and fresher
Instructions
- Set up your breading station:
- Arrange three shallow bowls in assembly line fashion, one with flour, one with the egg and milk whisked together until frothy, and one with the breadcrumbs, Parmesan, oregano, garlic powder, salt, and pepper combined thoroughly
- Prepare the chicken:
- Pat each breast completely dry with paper towels, then dredge first in flour with a gentle shake to remove excess, then into the egg wash letting any surplus drip off, and finally press firmly into the crumb mixture to ensure it sticks
- Get the oil ready:
- Pour the oil into your largest skillet and heat over medium-high until it shimmers and dances when you tilt the pan, which usually takes about 3 minutes
- Fry to golden perfection:
- Cook the cutlets in batches without crowding, about 3 to 4 minutes per side, until you achieve that deep golden color and the chicken reaches 165 degrees inside
- Rest and serve:
- Let them drain briefly on paper towels while you finish the batch, then serve immediately with those lemon wedges squeezed generously over the top
 Save
Save My daughter now requests these for her birthday dinner every year, and watching her carefully squeeze lemon over her plate with the same serious expression her grandmother used to wear makes me feel like I've passed down something more valuable than just a recipe.
Making Ahead Without Sacrificing Crunch
I've learned through trial and error that while you can bread the cutlets ahead and refrigerate them, they need to come to room temperature for about 20 minutes before frying to prevent the breading from separating during cooking. If you're feeding a crowd, fry them in the morning and reheat at 400 degrees for 8 minutes, which actually helps them crisp up even more than the first fry.
Serving Ideas That Go Beyond Dinner
These cutlets make incredible sandwiches the next day, piled high on good bread with arugula and a swipe of mayonnaise. I've also started cutting them into strips before frying to make chicken parmesan-style appetizers, or serving them over salad with that same lemon juice and a drizzle of good olive oil for a lighter weeknight meal.
The Secret To Restaurant-Quality Results
The difference between home-cooked cutlets and restaurant versions usually comes down to two things I discovered after years of okay results. First, letting the breaded chicken rest on a wire rack for 10 minutes before frying gives the coating time to set properly. Second, finishing them with a quick 30-second stint under the broiler right before serving adds that extra crispiness that makes people wonder what restaurant you ordered from.
- Keep a instant-read thermometer nearby to avoid overcooking the chicken while waiting for the breading to color
- Season the flour with a pinch of salt and pepper for extra flavor in every layer
- Never drain on paper towels for more than a minute or the steam trapped underneath will make the bottom soggy
 Save
Save These cutlets have become my go-to for busy weeknights when I need something that feels special but doesn't require me to spend hours in the kitchen after a long day.
Recipe Questions & Answers
- → How do I get the breading to stick to the chicken?
-
Pat the chicken completely dry before dredging. Press the breadcrumb mixture firmly onto each piece after the egg wash. Let the coated cutlets sit for 5-10 minutes before frying to help the coating set.
- → Can I bake these cutlets instead of frying?
-
Yes. Place coated cutlets on a greased baking sheet and bake at 400°F for 20-25 minutes, flipping halfway through. Spray the tops lightly with olive oil for better browning. The texture will be less crispy than fried.
- → How thin should I pound the chicken?
-
Pound to about ½-inch thickness for even cooking and tender results. Use a meat mallet or rolling pin between two sheets of plastic wrap to prevent tearing. Thinner cutlets cook faster and stay juicy.
- → Can I prepare these ahead of time?
-
Yes. Bread the cutlets up to 4 hours ahead and refrigerate on a parchment-lined baking sheet. Fry just before serving. Leftovers reheat well in a 375°F oven for 10 minutes to restore crispiness.
- → What's the best oil for frying cutlets?
-
Olive oil adds authentic Italian flavor, but vegetable oil works well too. Use enough oil to reach about ¼-inch up the sides of the skillet. The oil is ready when it shimmers and a breadcrumb sizzles immediately.
- → How do I know when the cutlets are done?
-
Cook until golden brown, about 3-4 minutes per side. The internal temperature should reach 165°F when measured with a meat thermometer. The cutlets should feel firm but springy when pressed.