 Save
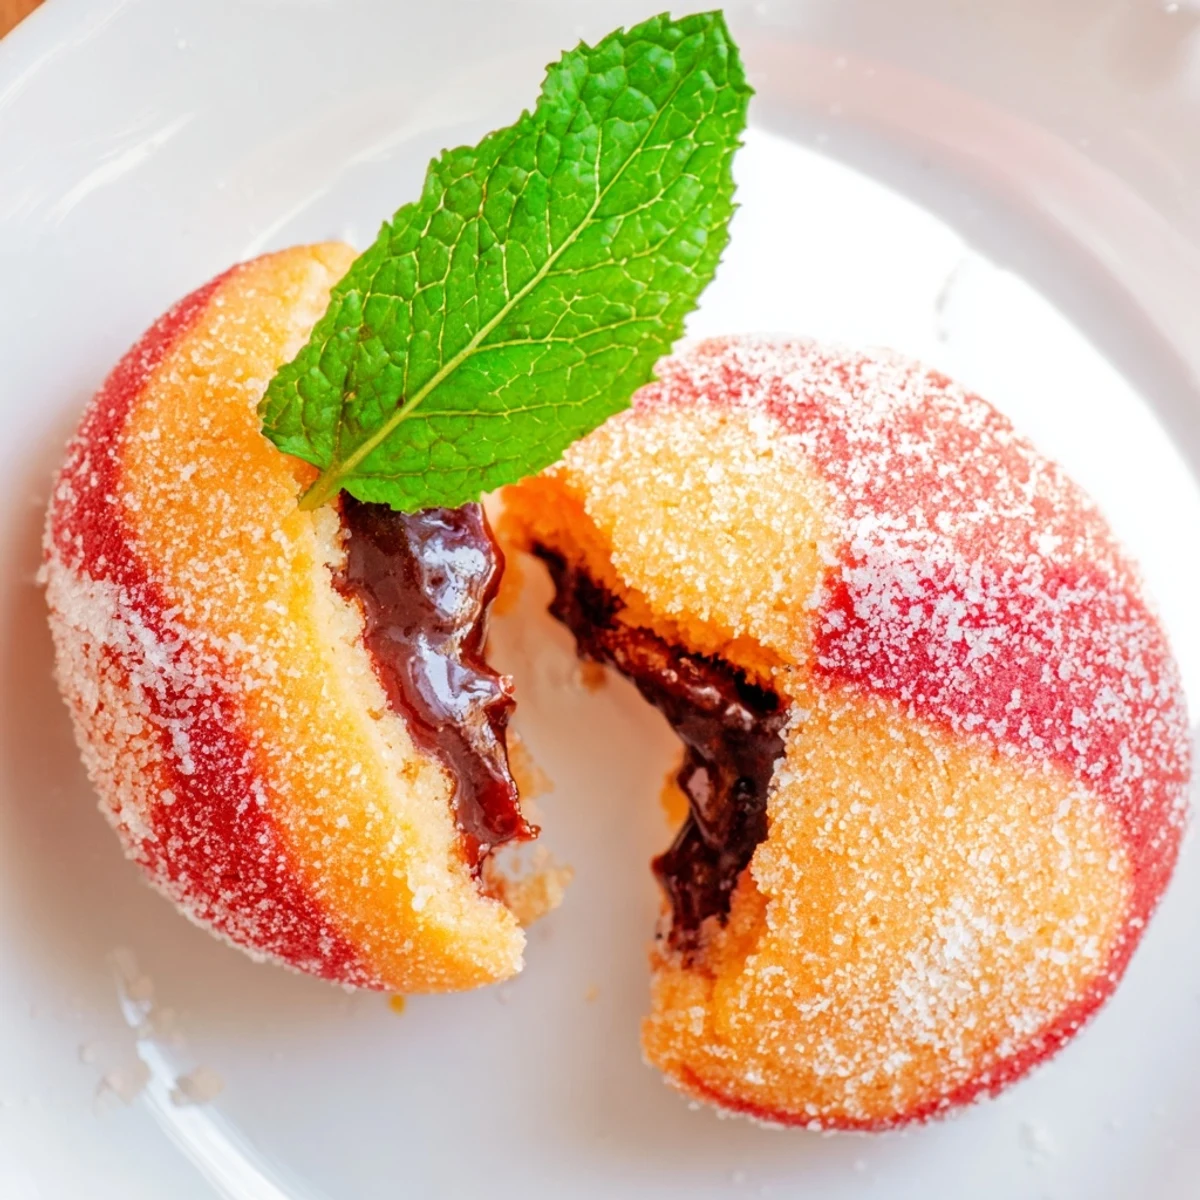
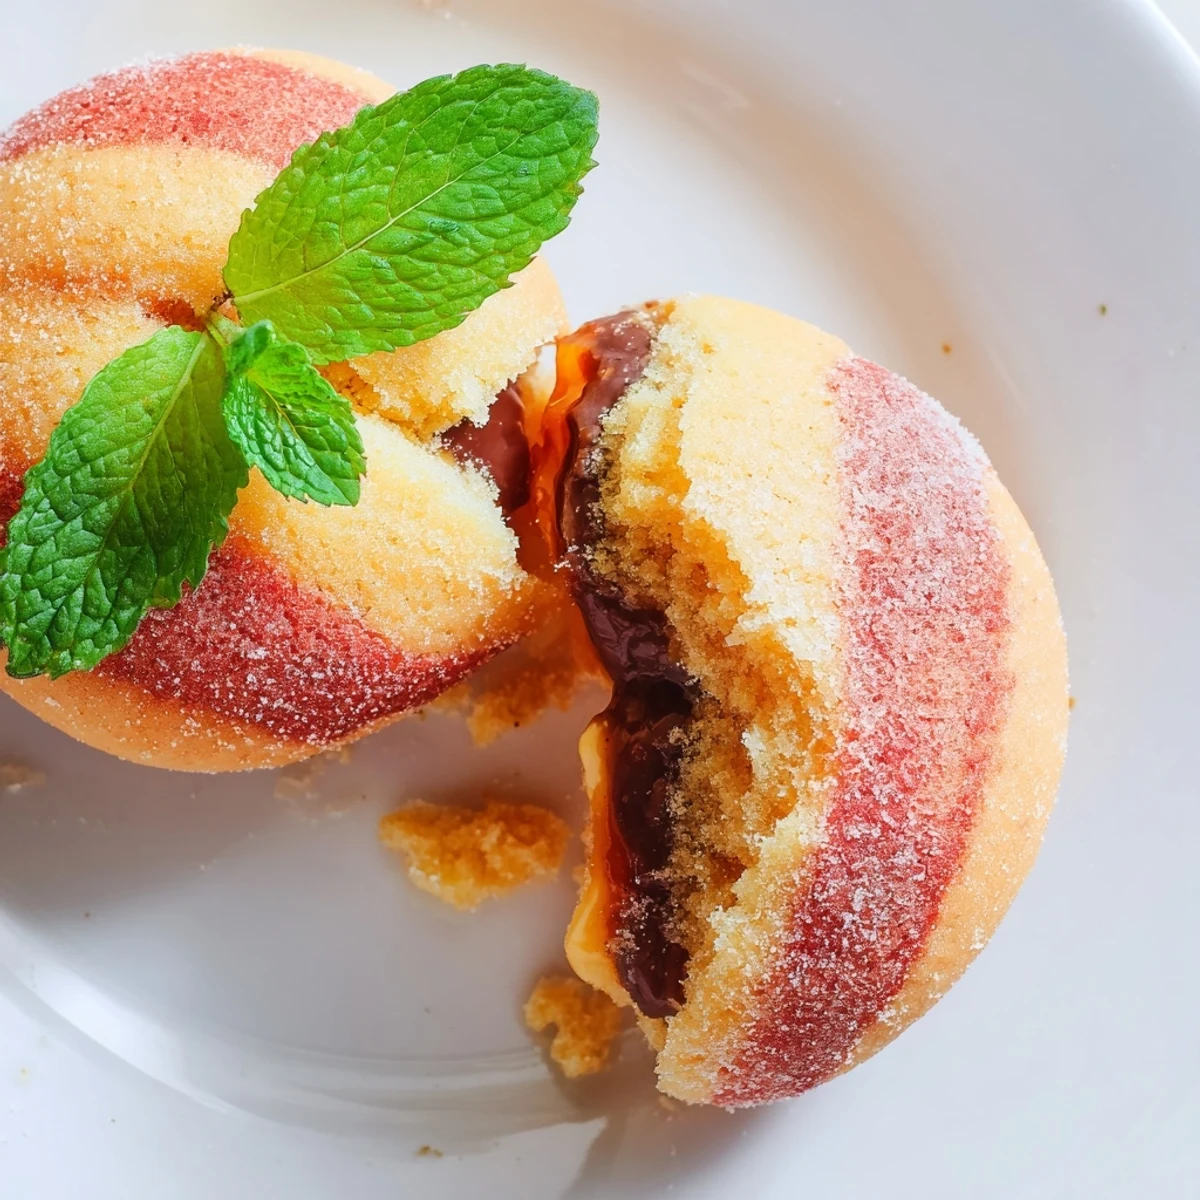
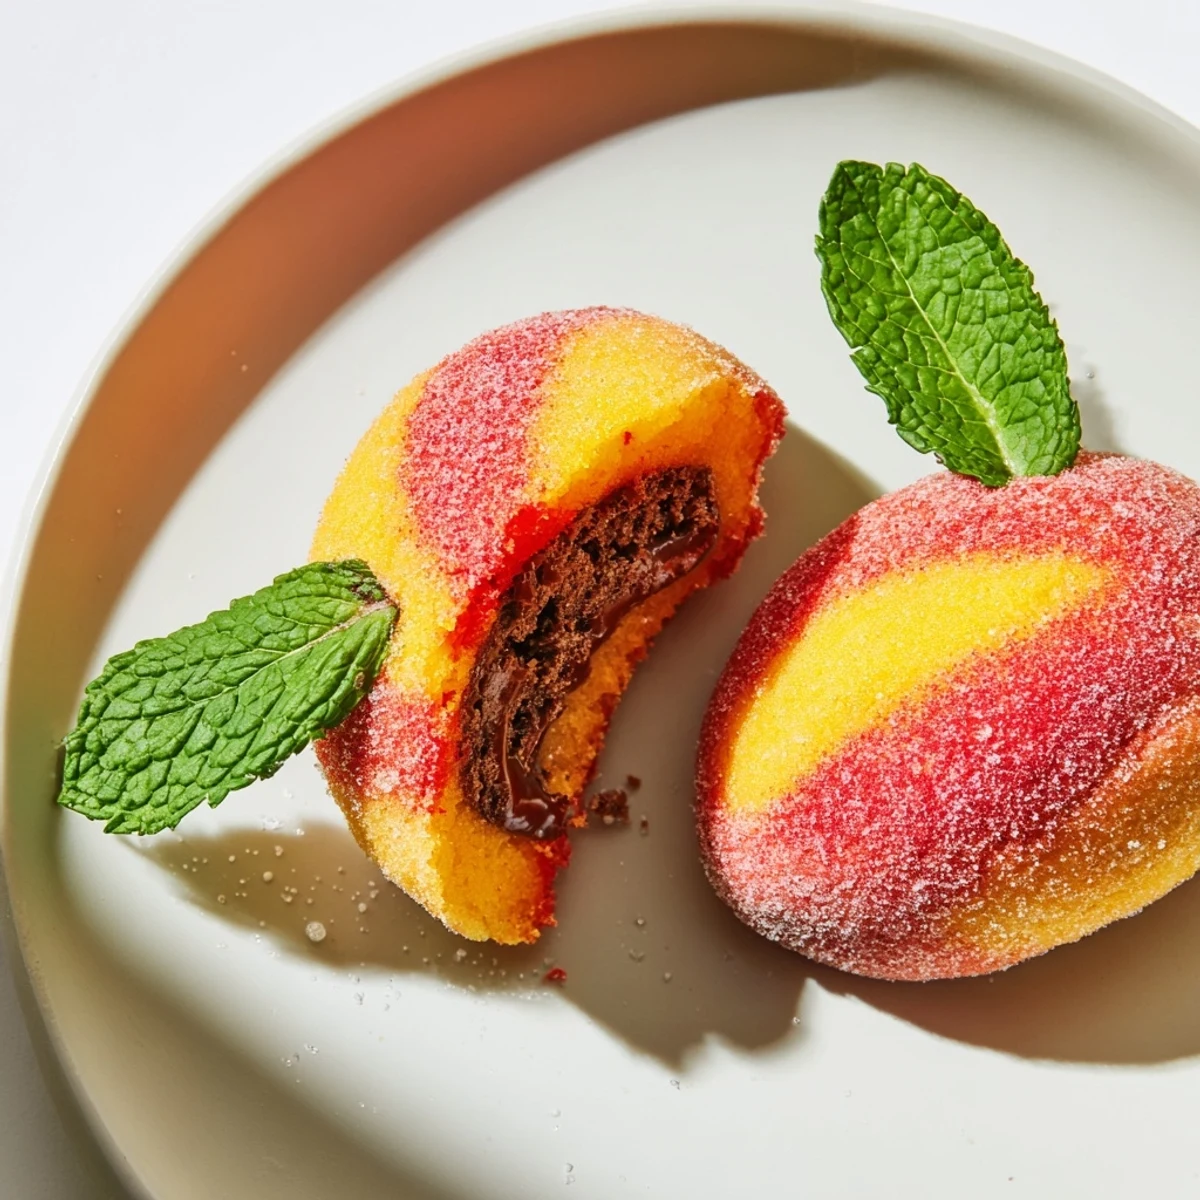
Save Create stunning peach-shaped cookies inspired by Italian baking traditions. These delightful sandwich treats combine soft vanilla-lemon dough with a luscious filling of melted dark chocolate and peach or apricot jam. Each cookie gets hand-painted with natural food coloring to achieve that authentic peach blush, then rolled in sparkling sugar for the perfect finish. The process involves baking tender rounds, creating a small cavity, filling with the chocolate-jam mixture, and sandwiching pairs together. A final touch with mint leaves adds realistic stems. These decorative cookies shine at parties, holidays, and special gatherings.
The first time I bit into an Italian peach cookie, I honestly thought someone was playing a trick on me. It looked exactly like a small peach sitting on the dessert tray, complete with that perfect fuzzy blush. Then I took a bite and discovered this incredible combination of tender cookie, rich chocolate, and fruit jam. I spent the next three months trying to recreate that magic in my own kitchen.
I made these for my daughters birthday last summer and watched her friends circle the dessert plate twice before daring to touch them. One girl finally picked one up, turned it over in her hands, and whispered, Its real food. That moment of pure delight made every minute of rolling dough and staining my fingers red worth it.
Ingredients
- All-purpose flour: The structure that holds everything together, dont substitute with whole wheat here
- Unsalted butter: Softened to room temperature so it creams properly into the sugar
- Granulated sugar: Creates the tender cookie texture and helps with that perfect golden bottom
- Large eggs: Bind the dough and add richness, use them straight from the fridge
- Whole milk: Adds moisture without making the cookies too dense
- Baking powder: Gives these just enough lift to stay tender
- Salt: A pinch balances the sweetness and brings out the vanilla
- Vanilla extract: Use the good stuff, it really shines here
- Lemon zest: Brightens the whole cookie and pairs beautifully with peach
- Peach or apricot jam: The classic filling that makes these taste like summer
- Dark chocolate: Chopped into small pieces so it melts evenly with the cream
- Heavy cream: Creates that silky ganache texture for the filling
- Red and yellow food coloring: Gel colors work best for that realistic peach blush
- Extra granulated sugar: For rolling, creates that magical fuzzy peach coating
- Fresh mint leaves: The finishing touch that makes them look remarkably real
Instructions
- Getting started with heat:
- Preheat your oven to 350°F (175°C) and line two baking sheets with parchment paper, this prevents sticking and makes cleanup so much easier.
- Creaming butter and sugar:
- Beat the softened butter and sugar until the mixture turns pale and fluffy, about 3 to 4 minutes with an electric mixer.
- Adding eggs and flavor:
- Drop in the eggs one at a time, letting each fully incorporate before adding the next, then mix in the vanilla and lemon zest.
- Whisking the dry ingredients:
- In another bowl, combine the flour, baking powder, and salt so everything distributes evenly.
- Bringing the dough together:
- Gradually add the dry mixture to the butter mixture, alternating with milk, until you have a soft dough that holds together.
- Shaping the cookies:
- Roll tablespoon portions of dough into balls and place them 2 inches apart on the prepared baking sheets.
- Baking to perfection:
- Bake for 15 to 18 minutes until the bottoms are lightly golden and the tops are just set, overbaking makes them too hard to hollow out.
- Cooling completely:
- Let the cookies rest on the baking sheets for 5 minutes before moving them to a wire rack to cool completely, they need to be fully cool before filling.
- Creating the peach cavity:
- Carefully scoop out a small hollow from the flat side of each cookie using a knife or spoon, saving those precious crumbs.
- Making the chocolate filling:
- Melt the chopped chocolate with heavy cream, stirring until completely smooth.
- Preparing the filling mixture:
- Stir the reserved cookie crumbs and jam into the chocolate until you have a thick, spreadable paste.
- Assembling the peaches:
- Fill the hollow of one cookie with the chocolate mixture and press another cookie against it, gently pressing to form that peach shape.
- Coloring the cookies:
- Mix a few drops of red and yellow food coloring into small bowls of water, then lightly brush the colors onto the cookies to create that natural peach blush.
- Adding the sugar coating:
- Roll each colored cookie in granulated sugar while still slightly damp from the coloring, pressing gently to help it stick.
- The final touch:
- Tuck a small mint leaf into the top of each cookie where the halves meet, if desired, for that stem detail.
 Save
Save Last Christmas, I brought a platter of these to my office party and watched my coworker Maria literally hold one up to the light, studying it like a piece of fine art. When she finally took a bite, her eyes widened and she immediately asked for the recipe, saying it reminded her of summers at her grandmothers in Sicily. Sometimes food really is the best bridge between strangers.
Making Them Ahead
These cookies actually improve after a day or two, which is rare for homemade cookies. The flavors meld together and the texture softens just enough. I always make them at least 24 hours before serving, storing them in an airtight container at room temperature. They never last longer than three days in my house anyway.
Getting That Realistic Look
The secret is in the randomness of the coloring, real peaches arent perfectly evenly colored. Start with yellow as your base, then dab on red where a peach would naturally blush, usually on one side more than the other. Blend the edges where the colors meet with a clean damp brush so it looks organic, not painted.
Serving Suggestions
These look stunning arranged on a vintage cake stand or simple white platter where the colors really pop. I serve them with espresso or after dinner as part of a dessert spread with fresh fruit. Theyre surprisingly not too sweet despite their appearance.
- Place a small card explaining they are cookies, not real fruit
- Keep them away from direct sunlight or the colors might fade
- Arrange them nestled in cupcake liners for easy serving
 Save
Save There is something so satisfying about serving dessert that makes people do a double take. Watch their faces when they realize these fuzzy little peaches are actually sweet, tender cookies hiding chocolate inside.
Recipe Questions & Answers
- → What makes Italian peach cookies authentic?
-
Authentic Italian peach cookies feature their signature shape achieved by sandwiching two round cookies together, hand-coloring with red and yellow food dyes to replicate natural peach blushing, and coating in granulated sugar. The traditional filling combines melted chocolate with fruit jam, creating the perfect balance between rich and sweet flavors.
- → Can I make these cookies ahead of time?
-
These cookies actually improve when made ahead. Prepare the dough and bake the cookies one day in advance, then fill, color, and coat with sugar the next day. The cookies soften slightly overnight, creating a more tender texture. Store assembled cookies in an airtight container at room temperature for up to three days.
- → What other jams work well for the filling?
-
While peach or apricot jam creates the most authentic flavor profile, you can experiment with raspberry, cherry, or even fig jam for different taste variations. The key is using a jam with natural fruit flavor that complements the dark chocolate filling without overpowering the delicate vanilla-lemon cookie base.
- → How do I achieve the realistic peach coloring?
-
Mix separate small bowls of water with red and yellow food coloring. Lightly brush the yellow over most of the cookie surface, then dab red coloring primarily on one side and around the indentation where the two cookies meet. Blend slightly where colors meet for natural gradients. The colors absorb differently into the sugar coating, creating depth.
- → Can I freeze these cookies?
-
Freshly baked, unfilled cookies freeze beautifully for up to two months. Thaw completely at room temperature before filling and decorating. However, once filled, colored, and sugar-coated, these cookies are best enjoyed within a few days as the moisture from the filling and coloring can affect the texture and appearance over time.
- → What tools are essential for making peach cookies?
-
You'll need basic baking equipment including mixing bowls, an electric mixer for creaming butter and sugar, parchment-lined baking sheets, and a small knife or melon baller for creating the filling cavity. A pastry brush is crucial for applying the food coloring, and having small bowls for separate colors helps achieve the realistic peach appearance.