 Save
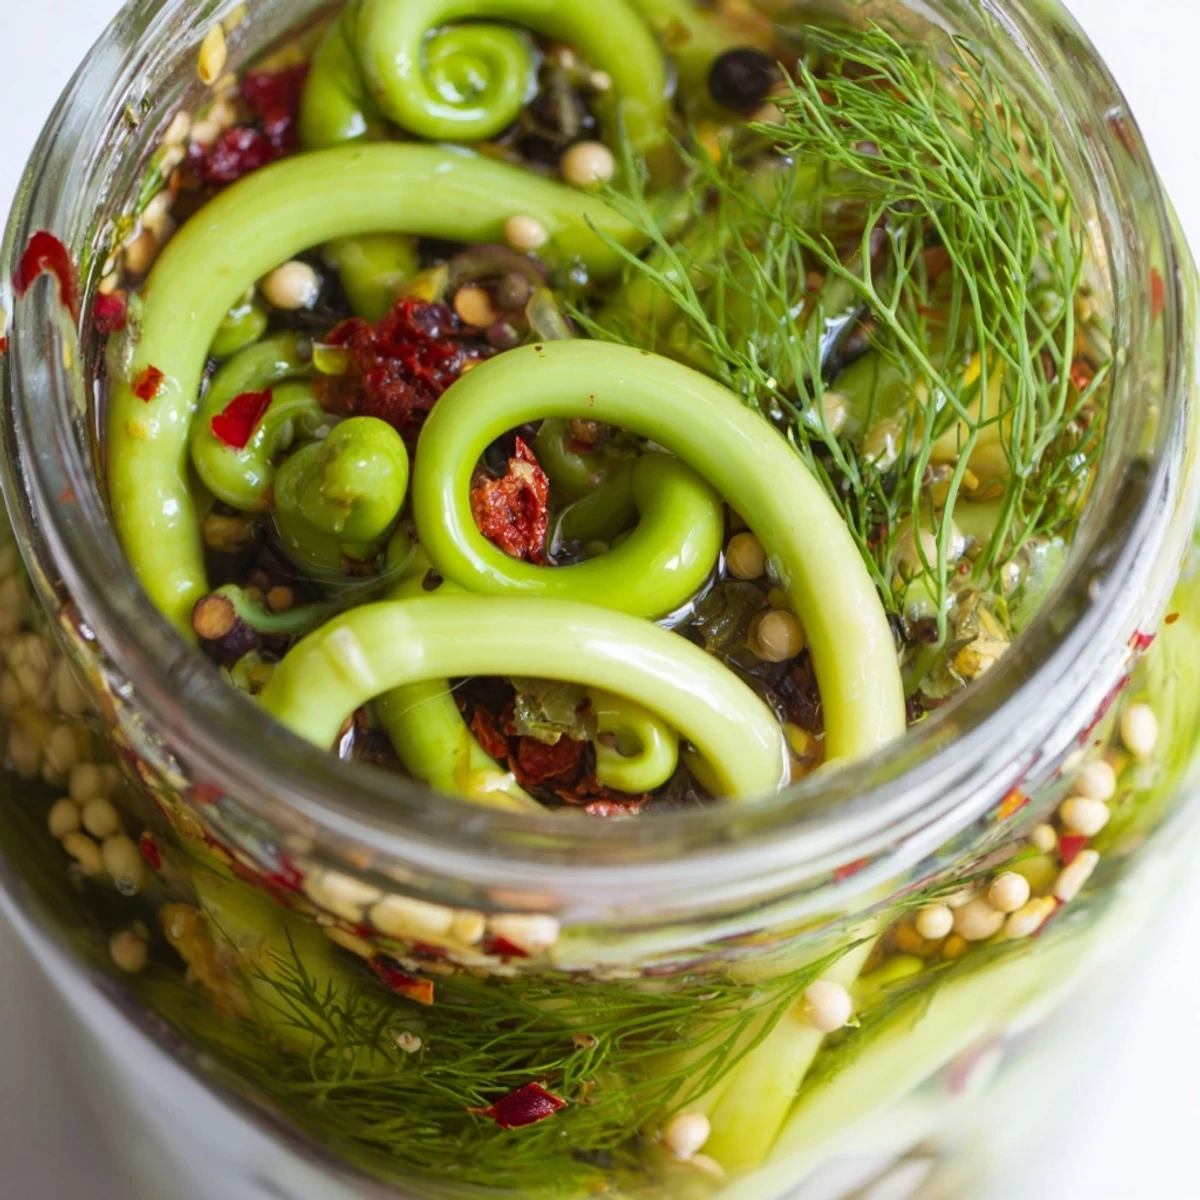
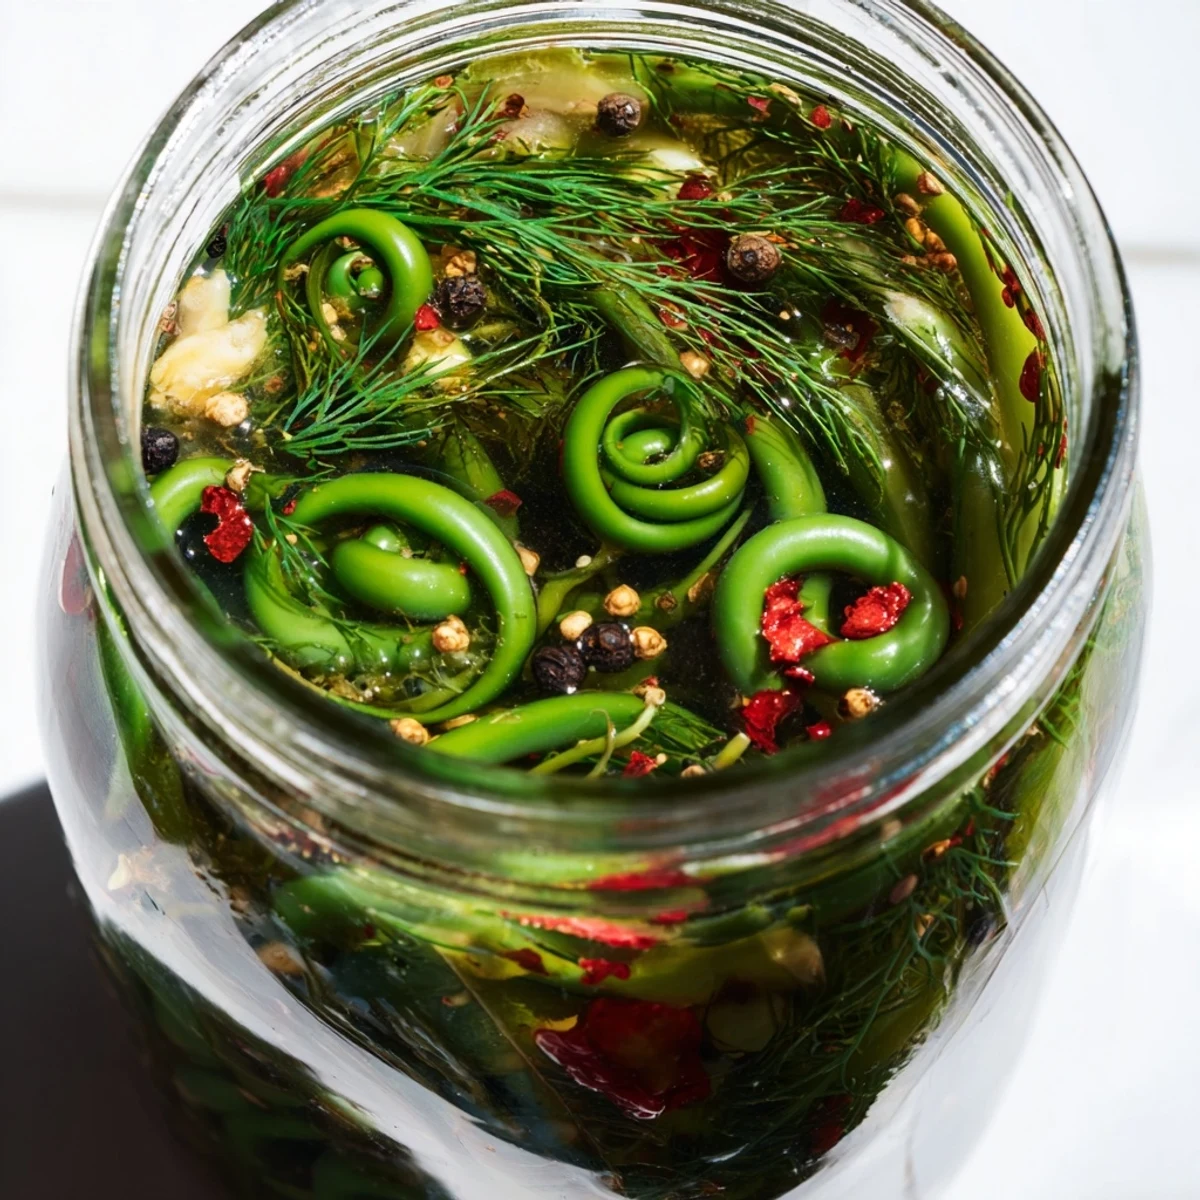
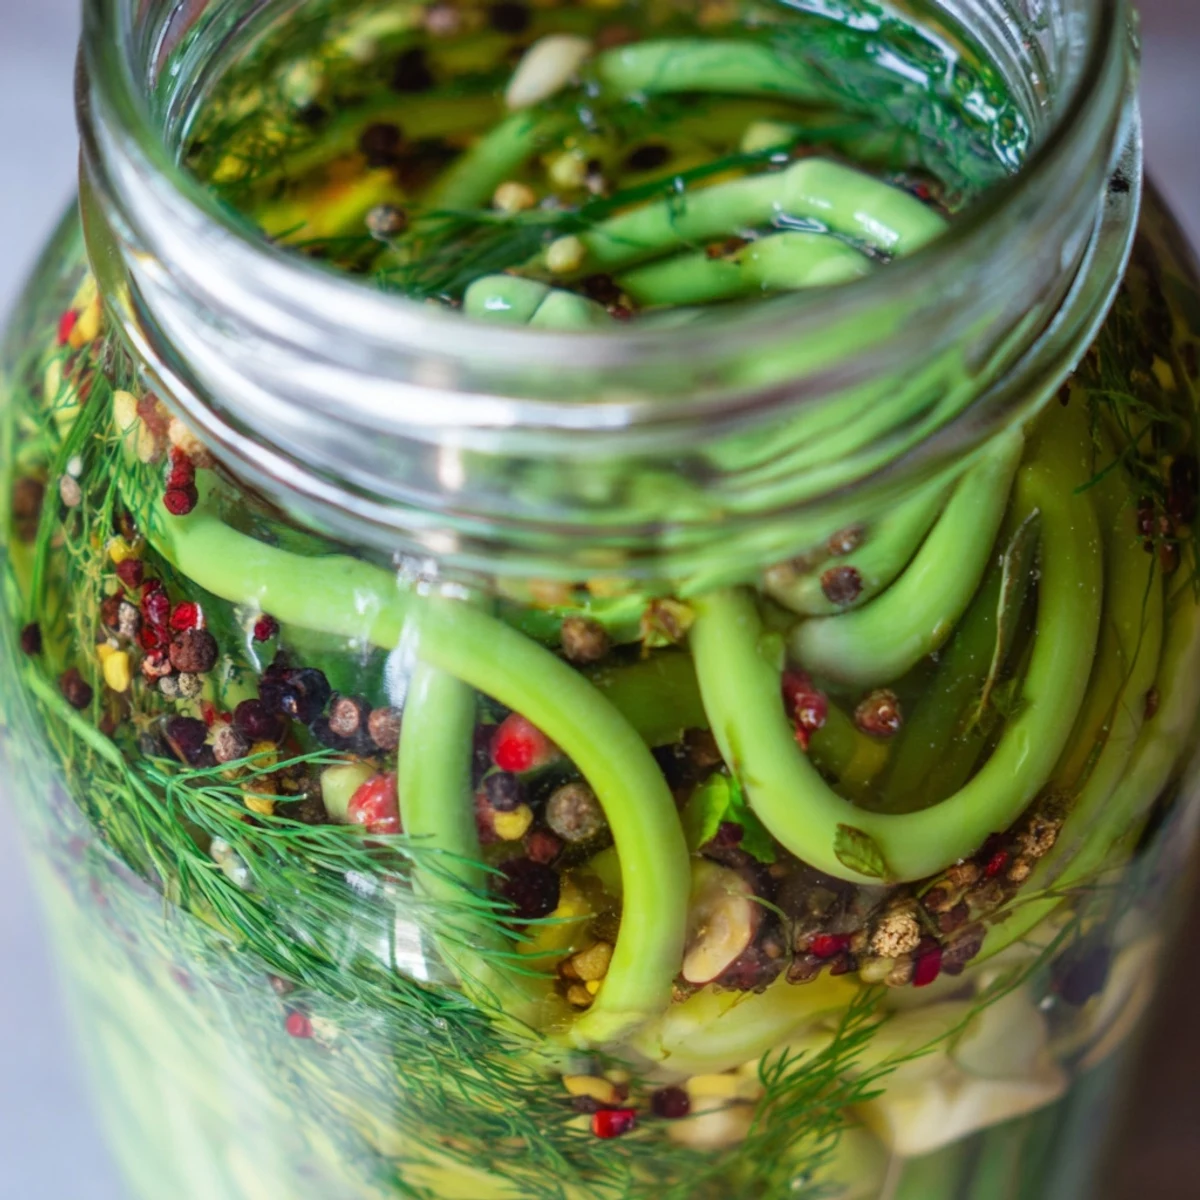
Save Create vibrant, tangy garlic scapes with a satisfying crunch and gentle heat. These curly stem pickles pack bold flavor through a simple vinegar brine infused with peppercorns, mustard seeds, coriander, and dried chilies. After just 48 hours of refrigeration, you'll have zesty condiments perfect for elevating cheese boards, sandwiches, or enjoying straight from the jar as a bold snack.
Standing at the farmers market last June, I watched a vendor snip the curlicue stems from garlic bulbs and toss them aside. When I asked what they were, she pressed a bunch into my hands and told me they'd change everything I thought I knew about pickling. She wasn't wrong. Now I find myself eagerly awaiting garlic season just for these flowering shoots.
Last summer I brought a jar to a backyard barbecue, mostly because I wasn't sure what to bring and wanted something that wouldn't wilt in the heat. My friend's dad, who's been pickling everything for forty years, took one bite and actually asked me for the recipe. Those moments when something you made becomes someone else's new favorite, that's the good stuff right there.
Ingredients
- Garlic Scapes (300 g / 2 large bunches): These flowering garlic stems taste like milder, sweeter garlic with a wonderful snap. Look for firm, bright green ones without any yellowing or soft spots.
- Distilled White Vinegar (250 ml / 1 cup): Clean and sharp, this lets the scapes shine without competing flavors. I've tried apple cider vinegar before and while it works, the final color isn't as vibrant.
- Water (250 ml / 1 cup): This dilutes the vinegar just enough so the pickles are tangy not harsh. Use filtered water if you can, especially if your tap water has a strong mineral taste.
- Granulated Sugar (2 tbsp): Just enough to balance the acidity and round out the sharp edges. Don't skip it, even if you don't like sweet pickles.
- Kosher Salt (1 tbsp): The coarse texture dissolves evenly and gives a cleaner taste than table salt. If you substitute, you'll need to adjust the amount.
- Black Peppercorns (1 tsp): These add a subtle warmth that builds in the background. I toast mine lightly in a dry pan first to wake up their oils.
- Mustard Seeds (1 tsp): They bring this tiny bit of pungent bite that cuts through the vinegar's sharpness. Yellow or brown both work beautifully.
- Coriander Seeds (1 tsp): Trust me on this one. Their citrusy floral notes make everything taste brighter and more complex.
- Red Pepper Flakes (1/2 tsp): Start here if you're heat cautious, but know that I usually double this amount. The heat mellows as they pickle.
- Dried Chilies (2 small): Tuck these whole into the jar for a slow steady warmth. Slicing them releases more heat if you want these feisty.
- Bay Leaves (2): Just one per jar adds this subtle earthy depth you'll notice but won't be able to quite place.
- Fresh Dill (4 sprigs): Completely optional, but that dill garlic combination is classic for a reason. Tuck a sprig in each jar before sealing.
Instructions
- Sterilize the jars:
- Wash everything in hot soapy water first, then either run through a dishwasher cycle or boil the jars and lids for 10 minutes. Set them on a clean towel to air dry, not touching each other.
- Prep the garlic scapes:
- Trim off any woody ends or dried bits, then cut them to fit your jars with about a centimeter of headspace at the top. If they're especially long and curvy, just curl them gently into the jar.
- Start packing:
- Divide the scapes, fresh dill sprigs if you're using them, and dried chilies evenly between your two sterilized jars. Tuck everything in snugly so the scapes won't float up when you add the brine.
- Add the aromatics:
- Split the spices between both jars, half each. The peppercorns and seeds will settle to the bottom, and that's perfect. Pop one bay leaf into each jar.
- Make the brine:
- Combine the vinegar, water, sugar, and salt in a saucepan over medium heat. Stir occasionally and bring it to a boil, making sure both the sugar and salt are completely dissolved.
- Fill the jars:
- Pour that hot brine carefully over the scapes, leaving about half an inch of space at the top. Press the scapes down gently with a clean spoon if they start floating up.
- Seal and cool:
- Screw the lids on tightly and let the jars sit on the counter until they reach room temperature. Don't tighten the lids again once cooled, or you might break the seal.
- Wait patiently:
- Refrigerate for at least 48 hours before trying them, though a week is even better. The flavors continue developing, and I've found they're still fantastic after a month.
 Save
Save My sister-in-law used to wrinkle her nose at pickled anything until I handed her a jar of these last Thanksgiving. Now she texts me in May asking when garlic season starts again. Watching someone discover they actually love something they thought they hated, that's a pretty good feeling.
Serving Suggestions
I love chopping these into potato salad for this unexpected garlicky crunch that wakes up the whole dish. They're brilliant next to rich foods like pâté or sharp cheddar on a cheese board. And don't get me started on how good they are tucked into a fried egg sandwich.
Make It Your Own
Last year I added thinly sliced carrots to the mix when I had extra scapes. The carrots pickled alongside and turned this gorgeous orange. Sometimes I throw in a smashed garlic clove or two for extra depth. The recipe is incredibly forgiving once you understand the basic brine ratio.
Troubleshooting & Timing
If your scapes taste too salty, try using them in cooked dishes where they'll be balanced by other ingredients. I once accidentally used table salt instead of kosher, and the difference was noticeable but not tragic. Learn from my measuring mistake. And if you can't wait the full 48 hours, at least give them 24, otherwise you're basically eating raw scapes in vinegar.
- Use filtered water if your tap water tastes strongly of minerals or chlorine
- Burp the jars gently after the first day to release any pressure buildup
- Keep the scapes submerged, and consider using a fermentation weight if they float
 Save
Save There's something deeply satisfying about transforming something people often discard into something so good it disappears first from every platter. Happy pickling, my friend.
Recipe Questions & Answers
- → What do garlic scapes taste like when pickled?
-
Pickled garlic scapes offer a milder, sweeter garlic flavor compared to cloves, with a pleasant crunch similar to asparagus. The tangy brine balances their natural sweetness while adding savory depth.
- → How long should I let these pickle before eating?
-
Wait at least 48 hours for optimal flavor development. The scapes continue to improve over time, reaching their peak after one week when the spices have fully permeated the crunchy stalks.
- → Can I adjust the spice level?
-
Absolutely. Increase red pepper flakes or add extra dried chilies for more heat. For a milder version, reduce the chili to half or omit entirely. The brine absorbs heat quickly, so taste as you go.
- → How long do these keep in the refrigerator?
-
Properly sealed and refrigerated, these pickled scapes stay fresh for up to one month. Ensure scapes remain submerged in brine and always use clean utensils when removing portions.
- → What dishes pair well with pickled garlic scapes?
-
They shine on charcuterie boards alongside sharp cheeses and cured meats. Add to sandwiches, burgers, or salads for tangy crunch. Chop into deviled eggs, potato salad, or serve alongside grilled meats and fish.